


With the waybill application, you can record your incoming/outgoing waybills, process stock movements and establish their connection with the invoice.
The following menus are located at the application entrance.
All Waybills: All inbound and outbound waybills are listed.
Incoming Waybills
All Incoming Waybills: All the incoming waybills in all the following situations are listed.
Drafts: Waybills that have not yet been transferred to the stock at the draft stage are listed.
Transferred to Stock: Waybills transferred to stock are listed.
Transferred to Invoice: Waybills transferred to invoice are listed.
Archived Waybills: You can continue to archive and keep your waybills that will not be linked to the invoice. If you do not want to list the waybills belonging to the old dates in the transferred to stock list, you can complete the process by entering the waybill details and clicking the Transfer to Archive button in the operations menu.
Canceled: Canceled waybills are listed.
Deleted Waybills: Deleted waybills are listed.
Outgoing Waybills
All Outgoing Waybills: Outgoing waybills in all cases listed below are listed.
Drafts: Waybills that have not yet been transferred to the stock at the draft stage are listed.
Transferred to Stock: Waybills transferred to stock are listed.
Transferred to Invoice: Waybills transferred to invoice are listed.
Archived Waybills: You can continue to archive and keep your waybills that will not be linked to the invoice. If you do not want to list the waybills belonging to the old dates in the transferred to stock list, you can complete the process by entering the waybill details and clicking the Transfer to Archive button in the operations menu.
Canceled: Canceled waybills are listed.
Deleted Waybills: Deleted waybills are listed.
Analysis
Products: You can access the product number, amount, VAT information of your general and outgoing waybills. When you click on the filter button at the top right, you can narrow the list according to your criteria, according to the date range and delivery note status from the field that opens. By increasing the level breakdown, you can access the details by product group & categories, and by clicking on the product name, you can list the waybills containing the relevant product and access the details. You can select the information you want to be displayed in the list by clicking the Columns button.
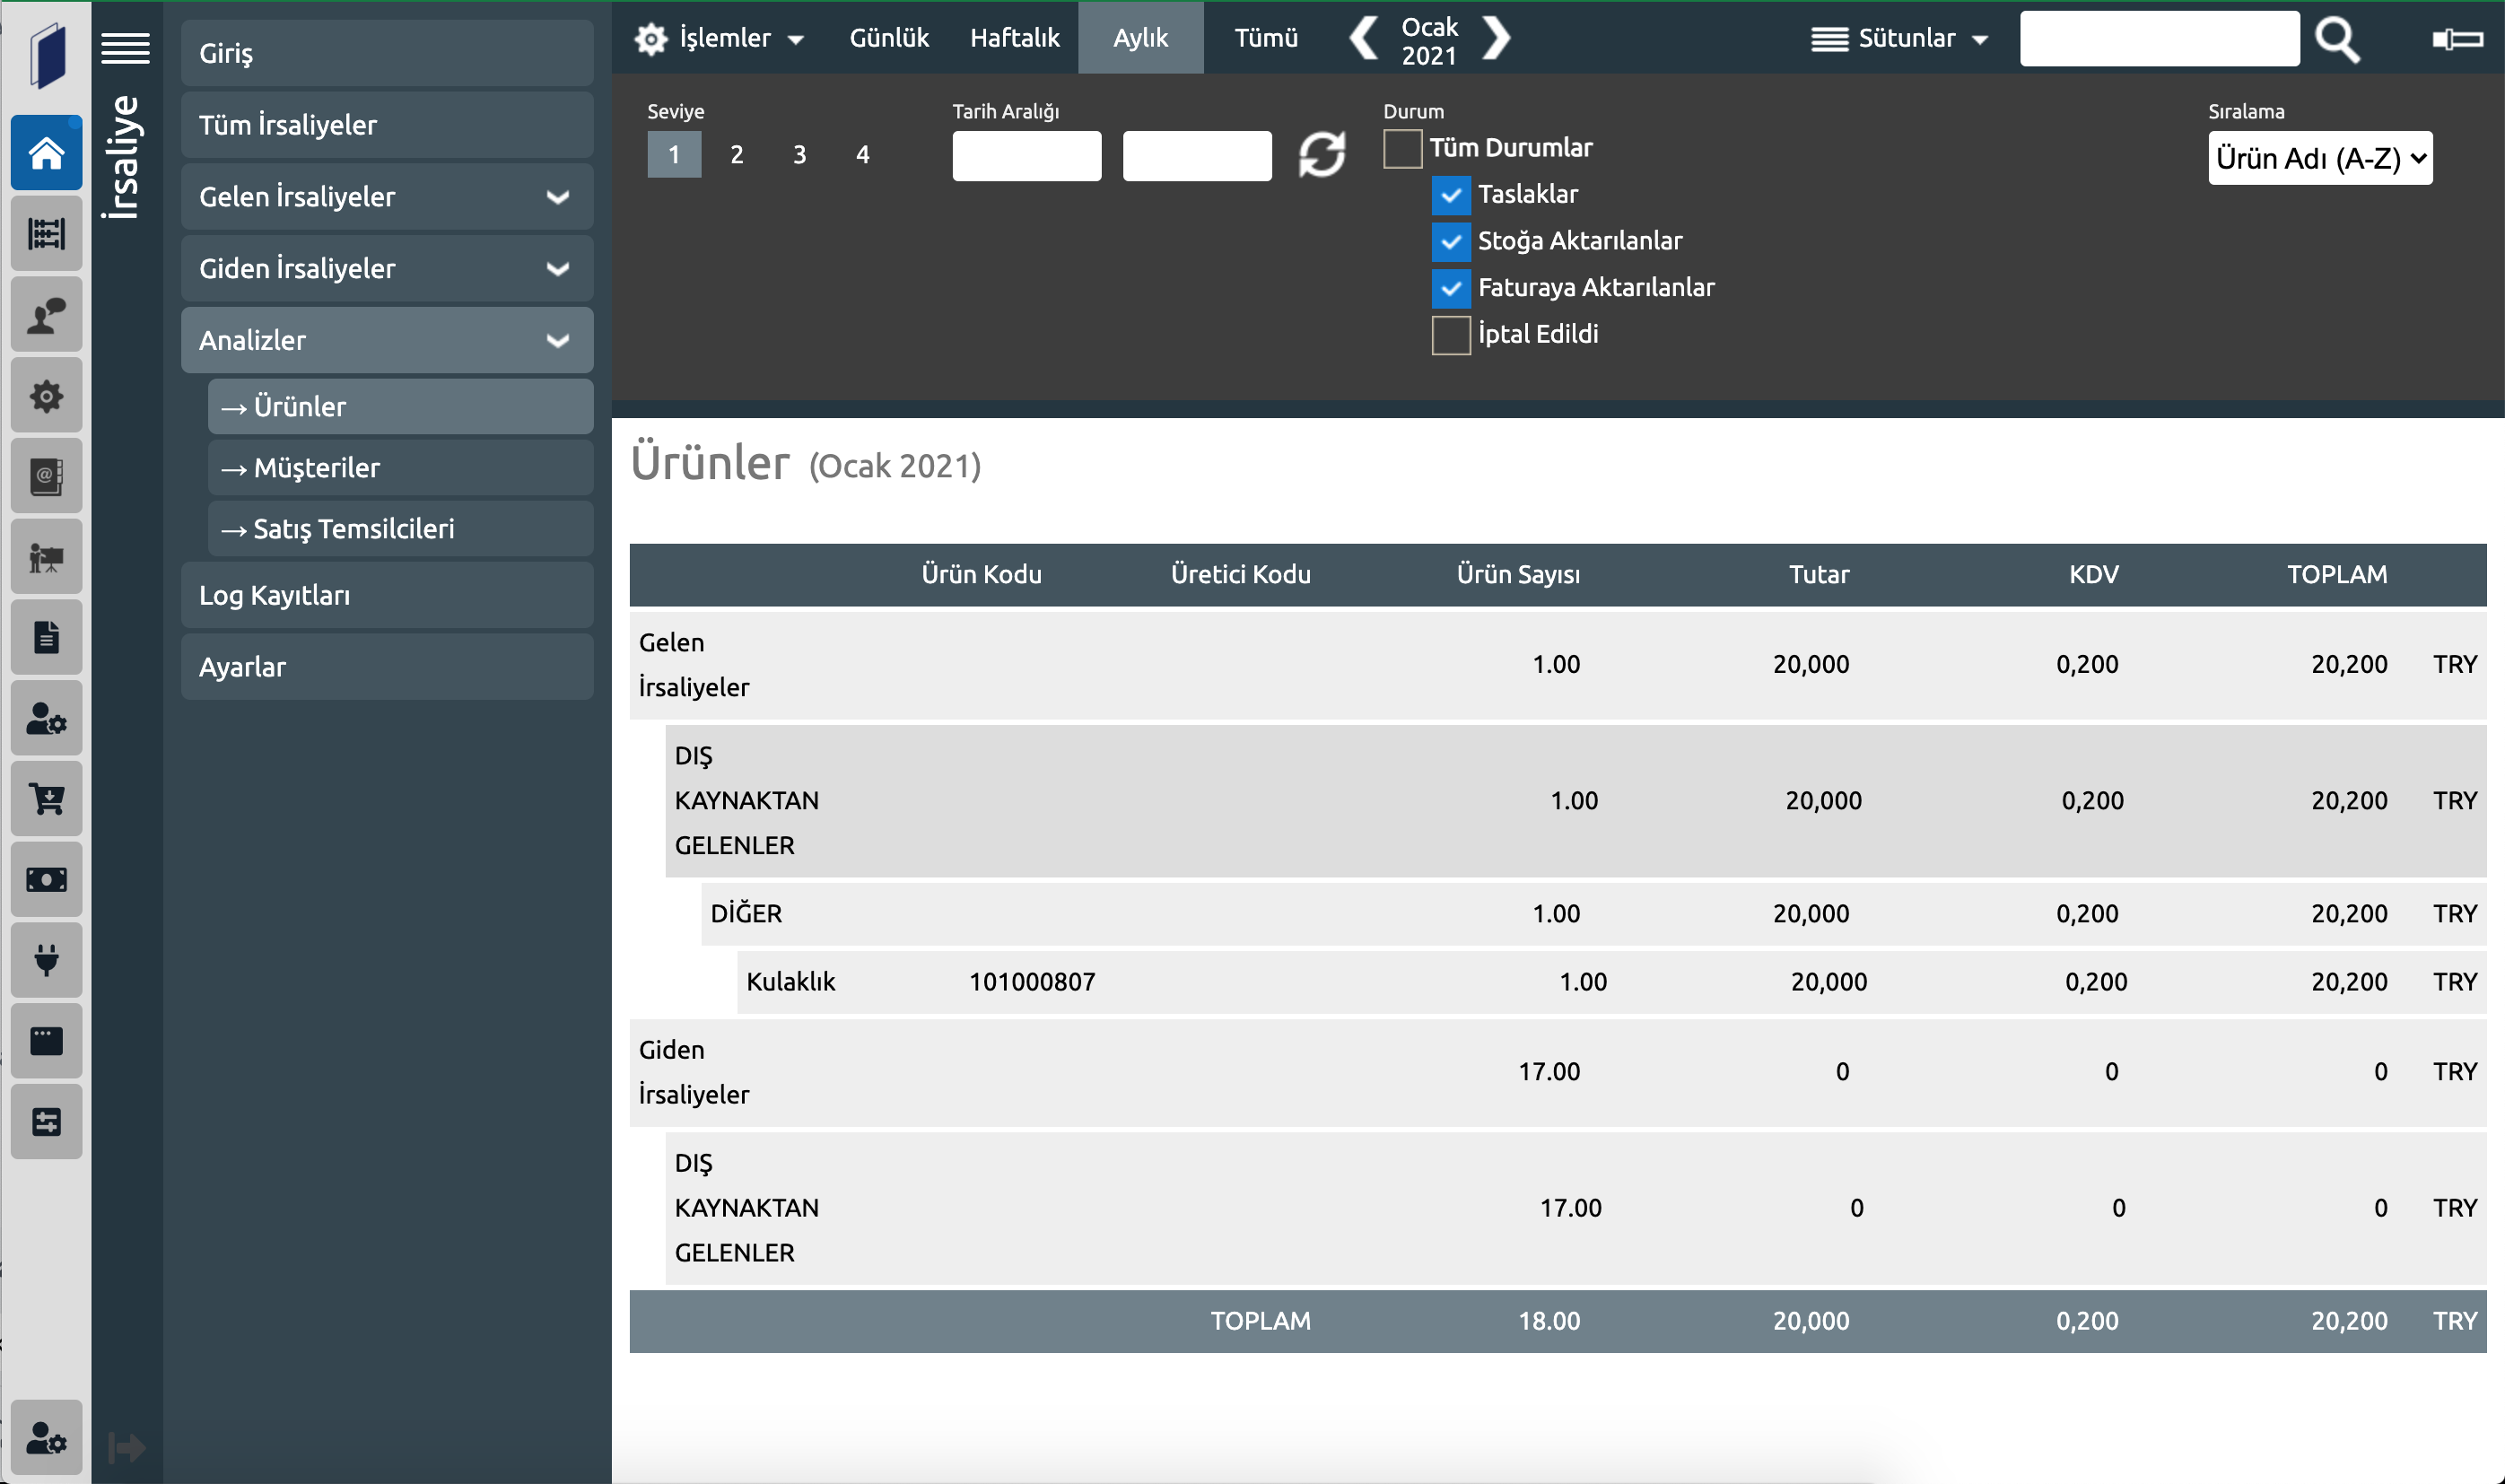
Customers: You can access the number of products, amount and VAT information of your incoming and outgoing waybills on a customer basis.
Sales Representatives: You can access the product number, amount and VAT information of your incoming and outgoing waybills based on sales representatives.
Log Logs: Changes made in application logs; user is listed with record title, description, transaction status and date information.
Settings
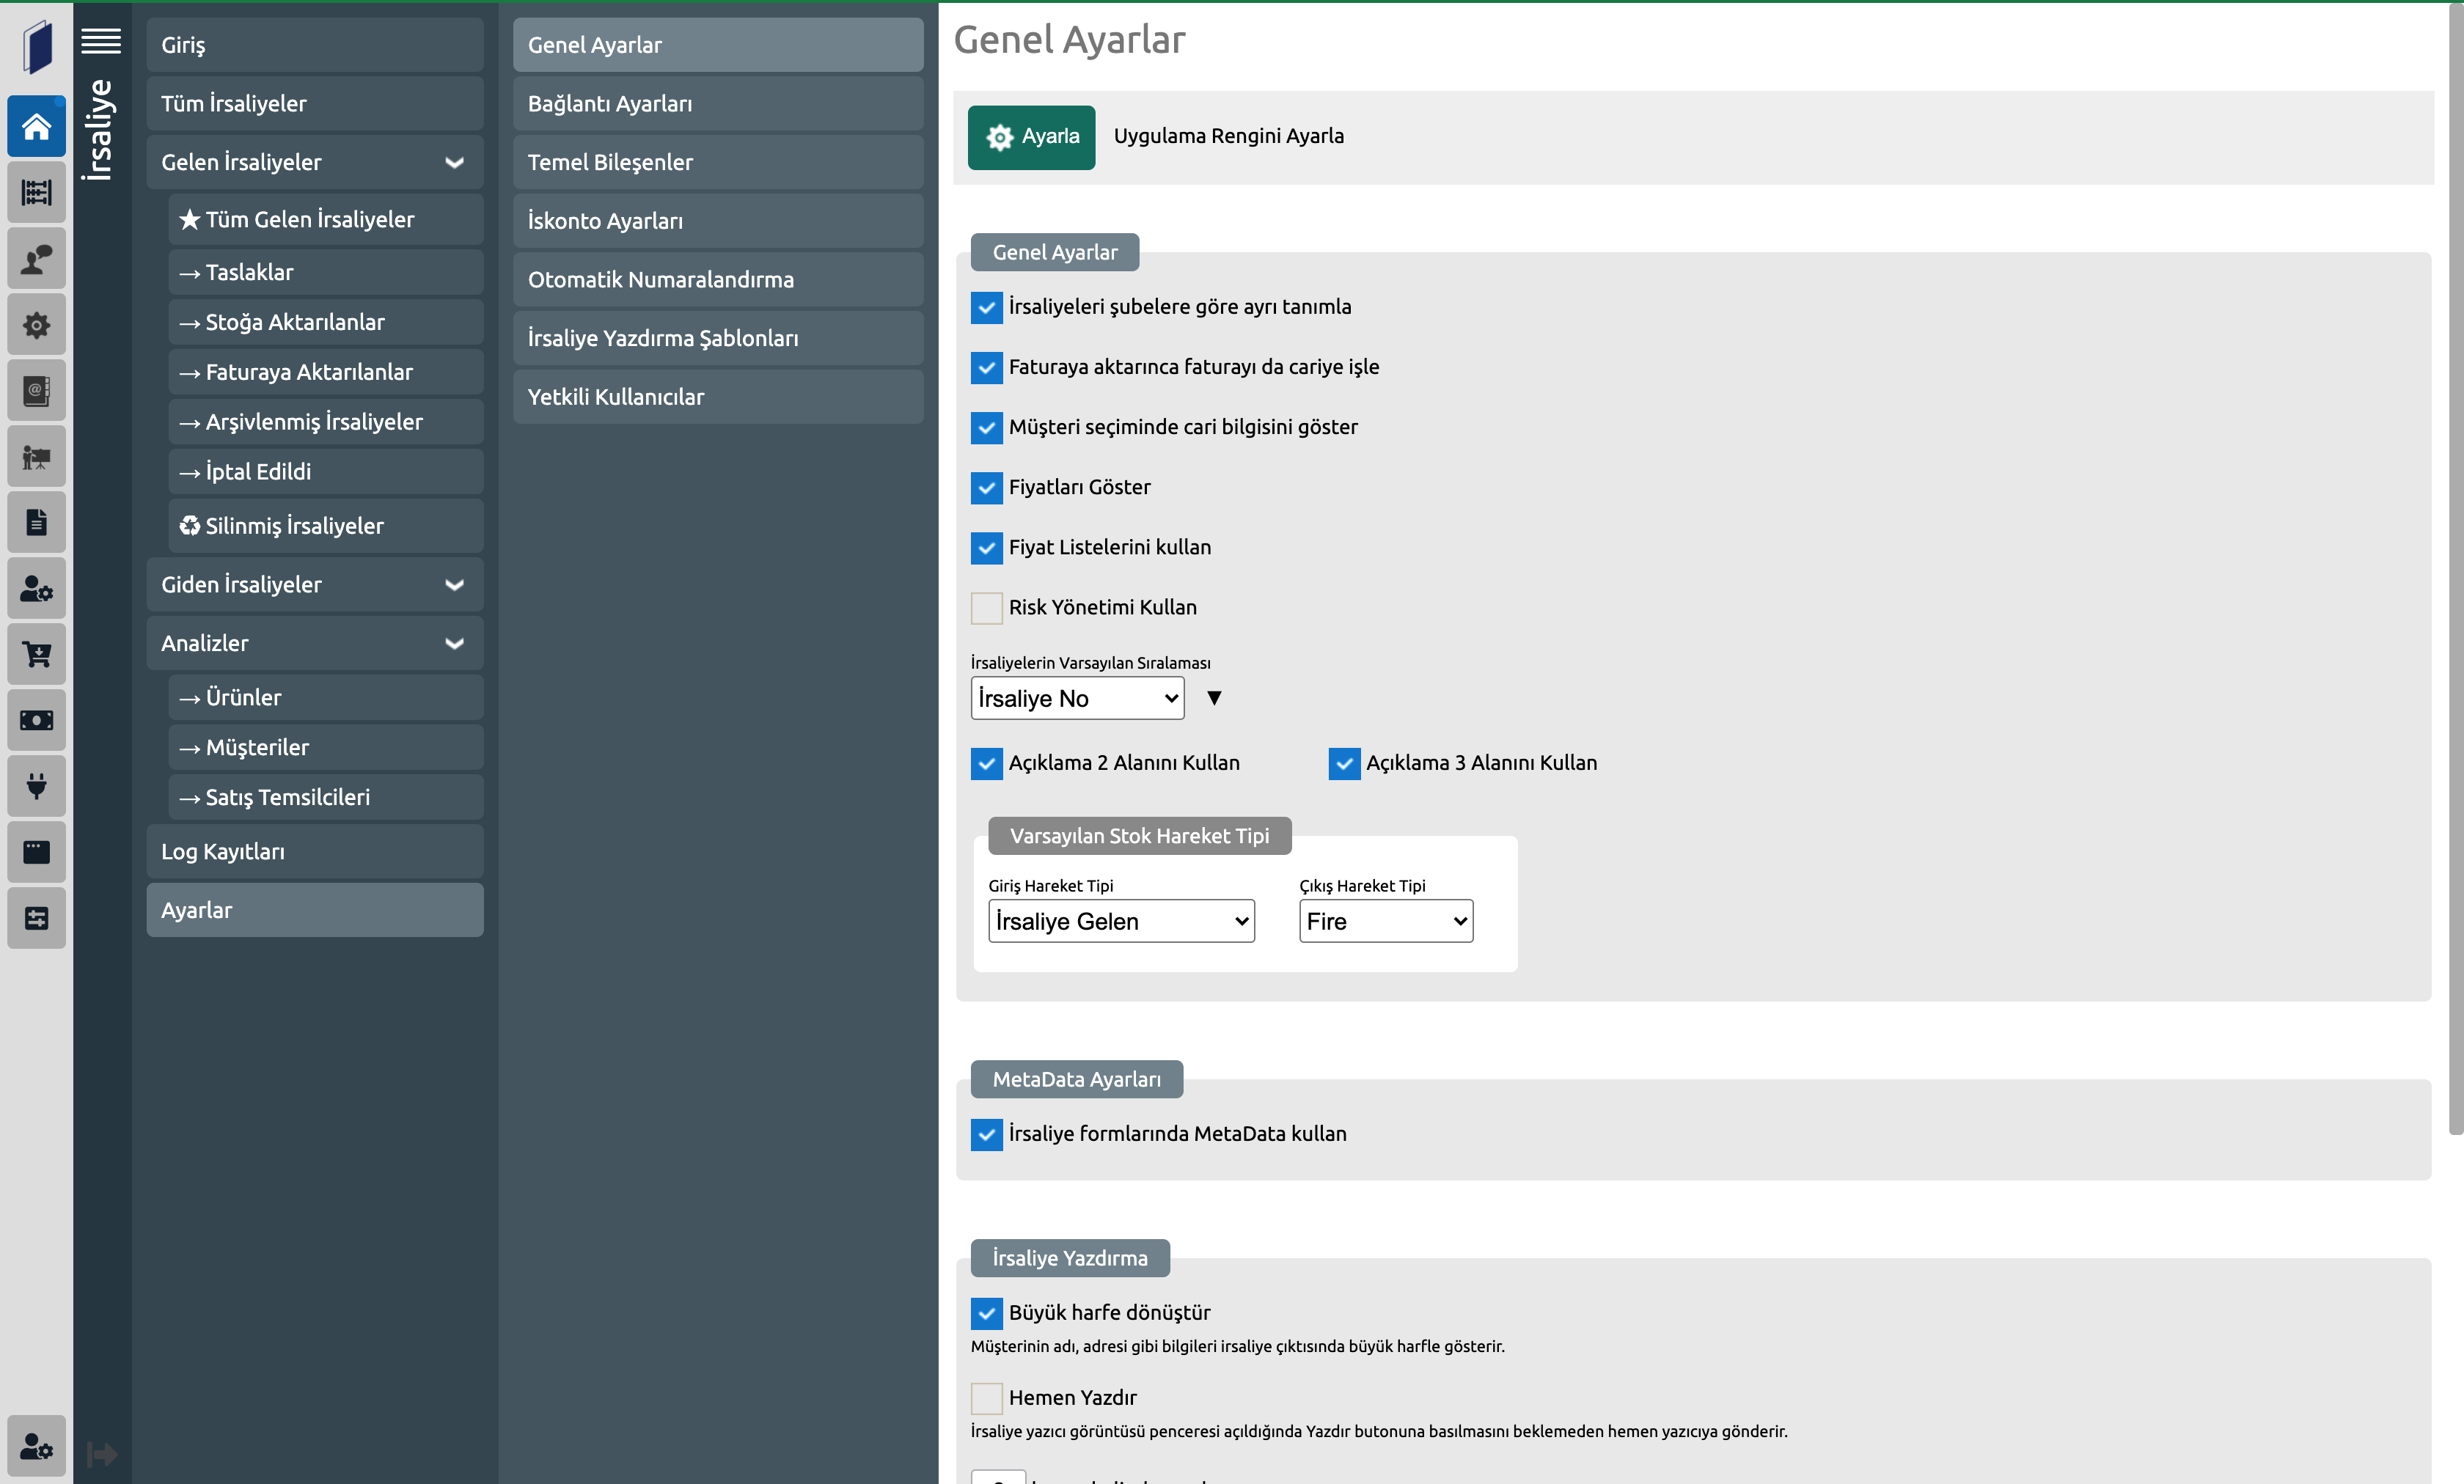
General Settings
Define waybills separately according to branches: Allows you to enter branch information at the waybill entry.
Process the invoice as concubine when you transfer it to the invoice: When you transfer the waybill to the invoice, the invoice is automatically transferred to the concubine.
Show current information in customer selection: The waybill record enables the current balance and status of the customer to be displayed in customer selection.
Show Prices: Allows the amount information entered in the waybill items to be displayed on the waybill detail and waybill list page. When the feature is disabled, price information is not displayed on the waybill detail and list page. Only the price information is displayed on the waybill item editing screen.
Use Price Lists: Provides the opportunity to benefit from price lists on the waybill item add/edit page. The price lists of the product are listed. You can use the list price for the relevant item by selecting the current price list.
Use Risk Management: Allows you to see the risk status of the customer while recording the waybill. It works according to the records found in the Risk Management application. You can find the details about the application in the relevant document.
Default Sorting of Waybills: You can choose a default sorting type for listing your waybills.
You can also make use of the 2nd and 3rd Explanation fields to use on the waybill.
Default Inventory Transaction Type: You can select your default transaction types for the entries and exits you will create from the waybill. Your transaction type definitions work from the definitions in the Warehouse Stock application Settings – Input-Output Types menu.
MetaData Settings
Use MetaData in Waybill Forms: It helps you to enter the defining properties for the waybill by entering Key and Value from the Meta Data menu in the waybill detail.
Waybill Printing
Convert to uppercase: Shows information such as the customer's name and address in capital letters on the waybill output.
Print Immediately: When the printer image window of the waybill is opened, it immediately sends it to the printer without waiting for the Print button to be pressed.
You can specify the number of copies for the waybills to print. It is possible to print as many as you specify.
Print each page manually: Can take advantage of the option to print each page manually for the specified number of copies. If the feature is not active, the waybill is automatically printed for the specified number of copies.
Pen Settings
Default Item List View: You can select a view type for the waybill item list.
Connection Settings: You can mark the applications you want to associate with the task log. E.g; By adding the customers application, you can keep the information for which customer the task will be performed.
Basic Components: You can add records through the applications you have marked in the task detail. E.g; You can specify the hours worked for the task if the activities application is attached, or you can add a document if the documents application is attached.
Discount Settings: Allows you to take advantage of discount types. Explanatory texts are included under the discount types. The product provides the opportunity to use customer, business partner, remittance, under-invoice discount and additive discount.
Automatic Numbering: You can have automatic numbering assigned to your outgoing waybills according to the prefix you specify, the number to increase and if you wish, the suffix.
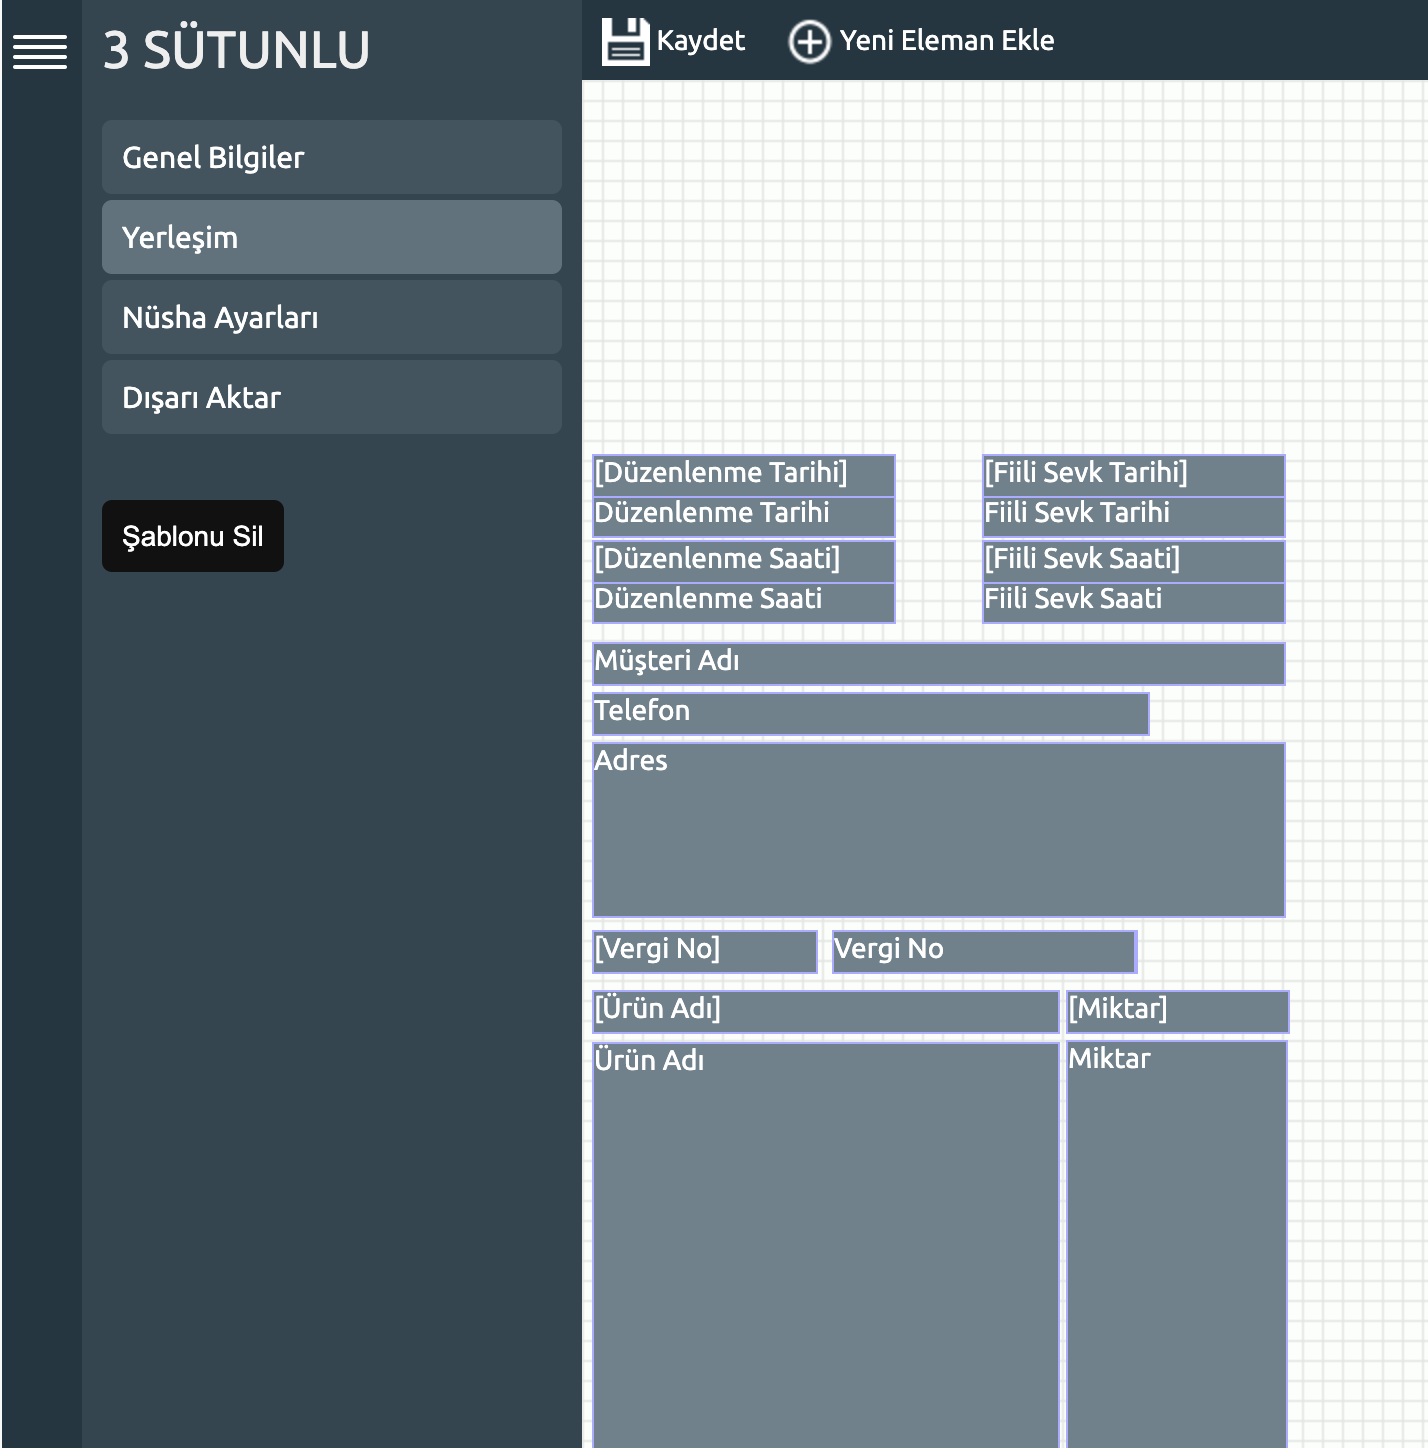
Waybill Printing Templates: You can define the waybill template you use here. When you click the Create New button, you can fill in the Template Name, language, and sections in the View field and complete the first step of the registration. You can select the elements you want to be included in the delivery note printing template by coming to the Layout area on the left menu, from the page that opens when you click the Add New Element button. Elements with “ [ ] “ signs are fixed fields.
E.g; “[Product Name]” is included in each waybill. The "Product Name" element that you will place below or next to it will appear as the product names on the waybill you have printed.
NOTE: After completing the placement process, you can change the location of the elements after trying them on a sample printing paper. By coming to the Help section on the upper right of the layout screen, you can access the shortcuts for element moving and sizing operations.
You can specify width, height and number of columns and rows from the Copy Dimensions menu.

Authorized Users: Users authorized to access the application are listed. You can add/remove authorizations for users.